Aging piping infrastructure continues to be a longstanding issue for many public and private organizations. Every year, companies with buried piping assets are required to make crucial decisions regarding maintenance, rehabilitation, and replacement.
The National Association of Corrosion Engineers (NACE) estimates that aging pipelines cost several industries millions of dollars in the United States alone. In light of this staggering data, pipeline operators are under increasing pressure to guarantee the integrity of their pipeline infrastructure, while minimizing risks and maintenance costs.
The Dawn of a New Technology – 3D Laser Scanning
Inspections provide the data necessary for pipeline companies need to make their investment decisions. Unfortunately, some inspection technologies currently used do not offer the required level of detail due to incomplete or inconclusive information.
One of the most widely used pipeline inspection technologies, closed-circuit television (CCTV), works by capturing video and images from inside the pipe. However, this tool produces qualitative results that are open to interpretation and errors. Another commonly used condition assessment method, visual inspection, is also unreliable and produces subjective results depending on the inspector.
The need for more precise condition assessments has led to the development of tools that can complement traditional methods while providing operators with definitive measurements. One such technology is 3D laser scanning, also known as LIDAR. This tool delivers quantitative readings of the pipeline’s geometric properties and surface characteristics. These readings allow operators to clearly identify and quantify deformations, deteriorations, and other points of weakness.
3D laser scanning equipment produces a highly detailed three-dimensional model of the pipeline, providing operators with a clear visual representation of the areas under consideration. Some laser scanning technology can even generate color-coded 3D images for even clearer presentation.
How Does 3D Laser Scanning Work?
3D laser scanning can refer to one of two commonly used laser scanning techniques: Light Detection and Ranging (LIDAR) or Structured Light Profiling. While both these methods collect the same types of information and present similar results, they operate using different concepts.
LIDAR works by measuring the time it takes a beam of light (photon) to bounce off a surface (a pipe wall in this instance) and back to a sensor. The value of the flight time is then used, along with other parameters, to determine the distance traveled. The laser scanning equipment rapidly emits beam pulses at various angles and directions, performing a ‘sweep’ of the general area, and recording hundreds, or even thousands, of distance measurements.
All the individual measurements represent coordinates, which are used to construct a full three-dimensional representation of the pipe, known as a ‘point cloud.’ The resulting 3D image can then be examined using specialist software to highlight affected areas.

Figure 1: Simplified diagram showing the LIDAR's operating principle (source)
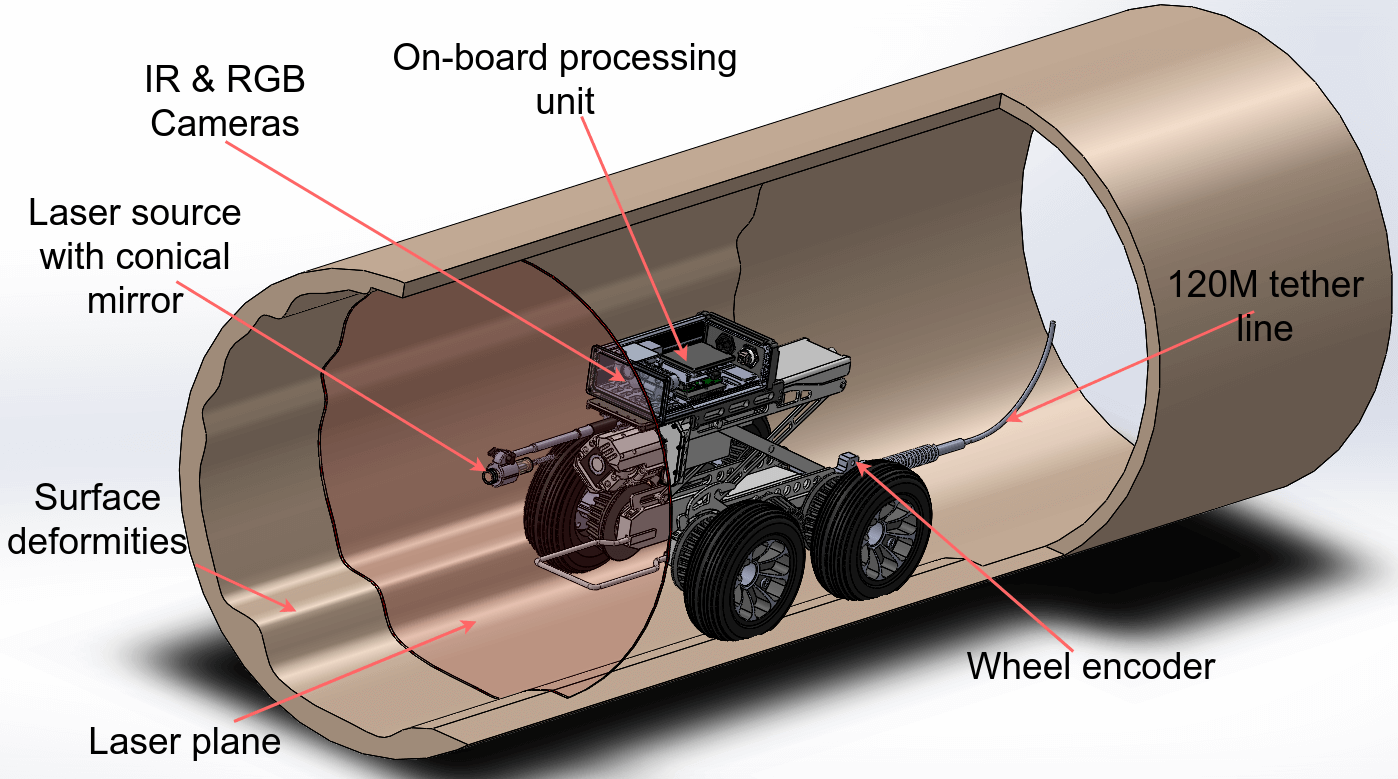
Structured light profiling, also known as laser profiling, works using a visible laser (usually ring-shaped) together with a CCTV camera. The structured light projector emits a visible narrow band of light onto the pipe wall in view of the CCTV equipment. Image post-processing techniques are then used to measure the geometric characteristics of the ring.
Any deformations in the pipe will affect the laser’s shape, which will then be recorded and measured by the laser tool. Each frame of video from the CCTV camera represents a single cross-section measurement of the pipeline. As the structured light profiling tool traverses through the pipeline, each cross-sectional ‘slice’ can then be stitched together to generate a fully detailed three-dimensional model.

Figure 2: Diagram showing the structured light profiling process in a pipeline (source)
Benefits of Using 3D Scanning for Pipe Inspections
As mentioned previously, other methods of piping inspection are subjected to guesswork. While CCTV and manual inspections provide visual feedback of the pipe’s interior, the results are open to interpretation. Additionally, both of these methods are unable to provide definitive and quantitative measurements pertaining to deterioration and deformations.
3D scanning, on the other hand, provides measurable results, which can be translated into precise, usable data. This allows inspectors to define pipelines defect by quantifiable parameters. This way, piping companies can better determine life expectancies as well as the appropriate repair or rehabilitation method.
Furthermore, 3D scanning makes it possible to inspect pipelines in potentially hazardous areas. For example, oil and gas pipelines, which can contain residual toxic chemicals, can be thoroughly inspected via highly detailed 3D imagery without having personnel enter the structure.
What Are the Limitations of Pipeline 3D Laser Scanning?
While LIDAR and structured light profiling are both valuable technologies, they possess limitations that should be clearly understood to guarantee the best results. Firstly, it is essential to note that lasers cannot “see through’ objects. In other words, they are only able to capture information within their line-of-sight.
For example, in large and complex piping networks, multiple scans may be required to capture all the necessary geometrical data. Furthermore, different laser scanners possess different effective distances and peripheral ranges; therefore, it is essential to understand the capabilities of the equipment.
When multiple scans are performed, the data from the individual scans need to be ‘stitched together’ to produce a single uniform ‘point cloud’ for analysis. This process requires skilled technicians; therefore, laser scanning is best done by knowledgeable and highly trained personnel.
Finally, for safety reasons, caution must be exercised when planning to use LIDAR in flammable environments, such as oil and gas and petrochemical plants. In these cases, a ‘hot work’ permit may be required.
What We've Learned
Regardless of the 3D scanning method used (LIDAR or structured light profiling), operators can make better-informed decisions based on quantitative and definitive measurement data. This contrasts traditional qualitative methods, which are subjective and prone to human error.
By subjecting the same pipeline to routine inspections using 3D scanning methods, accurate deterioration rates, and fact-based life expectancies can be obtained.